- Katılım
- 4 Kas 2014
- Mesajlar
- 48,661
- Reaksiyon puanı
- 13,835
- Puanları
- 195
This translation is written with PSP X8 if you work with older versions some things might be different but the result will be the same.
quote from tubes internet
MATERIALS
Ziyaretçiler için gizlenmiş link,görmek için
Giriş yap veya üye ol.
PLUGINS
Mura's Meister-Perspective Tiling
Graphics Plus-Horizontal Mirror
Penta.com-VTR 2
L&K -Zitah
Alien Skin Eye Candy 5: Impact - Perspective Shadow
COLORS
#660e37 #ffffff
Foreground Color :#660e37
Background Color :#ffffff
TUTORIAL
1-File New Transparent Layers 900 x 600 (Raster 1)
2-Fill with Foreground Color #660e37
3-Layers- New Raster Layer (Raster 2)
4-Fill with Background Color #ffffff
5-File-Open-Narah Mask 0722
6-Narah Mask minimize return work
7-Layers-New Mask Layer-From Image
8-Layers-Merge-Merge Group (Group Raster 2)
9-Effects-3D Effects-Drop Shadow #000000
10-Edit-Repeat Drop Shadow
11-Effects-Edge Effects-Enhance
12-Layers-Merge-Merge Down (Raster 1)
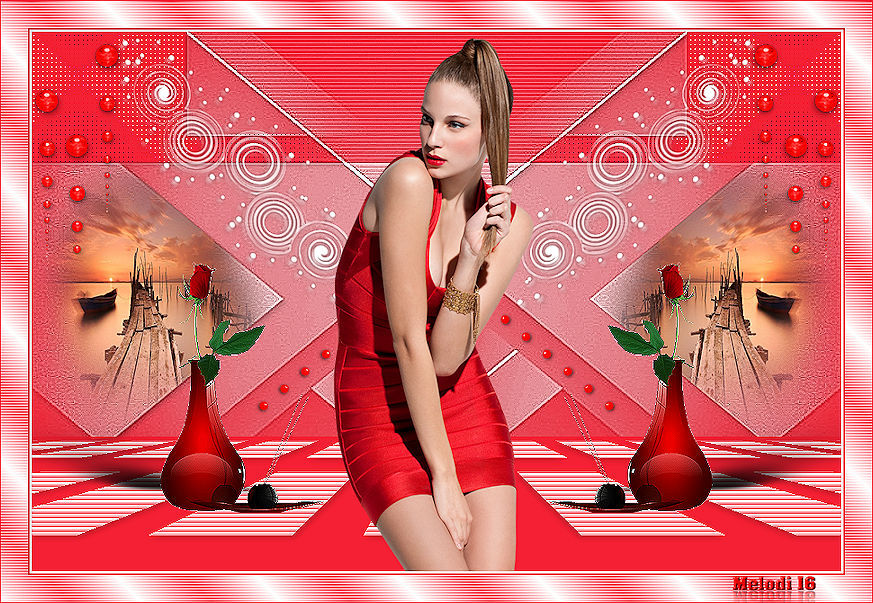
Result
13-Layers-Duplicate (copy of Raster 1)
14-Layers-New Raster Layer (Raster 2)
15-Selection Tool
settings
16-Custom Selection
17-Fill with Foreground Color #660e37
18-Selectıons-Modify-Contract 50 pixels
19-Fill with Background Color #ffffff
20-Selections-Select None
Result
21-Effects-Plugins-Mura's Meister-Perspective Tiling
22- Activate Magıc Wand settings
23-White areas are selected as shown in the picture
24-Effects-Texture Effects-Blinds - color #660e37
25-Effects-3D Effects-Drop Shadow #000000 same parameters
26-Adjust-Sharpness-Sharpen
27-Selections-Select None
Result
28-Layers-Merge-Merge Down (Copy of Raster 1)
29--Effects-Plugins-I.C.Net Software-FiltersUnlimited 2.0-Graphics Plus-Horizontal Mirror
30-Layers-Merge-Merge Visible (Merged)
31-Layers-Duplicate (Copy of Merged)
32-Activate Freehand Selection settings
33-We choose the region in the picture
34-Effects-Plugins-I.C.Net Software-Filters Unlimited 2.0-Penta.com-VTR 2
35-Adjust- Saharpness- Sharpen
36-Effects-3D Effects-Drop Shadow #000000 same parameters
37-Selections -Select None
Result
38- Activate Freehand Selection settings same parameters
39-We choose the region in the picture
40-File-Open-Tube 1
41-Edit-Copy
42-Tube 1 minimize return work
43-Edit Paste İnto Selection
44-Adjust- Saharpness- Sharpen
45-Effects-3D Effects-Drop Shadow #000000 same parameters
46-İmage-Miroir
47-Selections -Select None
Result
48- Activate Freehand Selection settings same parameters
49-We choose the region in the picture
50-Effects-Plugins- L&K -Zitah
51-Adjust- Sharpness- Sharpen More
52-Effects-3D Effects-Drop Shadow #000000 same parameters
53-İmage-Miroir
54-Selections -Select None
55-File Open - Hüzünlüyıllar -Hadley_deko_2 –
56-Edit Copy
57-Return to work - Edit - Paste As New Layer
58- Activate Pick Tool –
59-We place deco
60- We end the selection with Pan Tool
61-Adjust- Saharpness- Sharpen More
62-Effects-3D Effects-Drop Shadow #000000 same parameters
63-Layers-Duplicate(Copy of Raster 1)
64-İmage-Miroir
65-Layers Panel
66-File-open-Deco 3
67- Edit-Copy
68- Deco 3 minimize return work
69- Edit -Paste As New Layer (Raster 2)
70-Active Pick Tool settings
71-We place deco
72- We end the selection with Pan Tool
73-Adjust-Sharpness-Sharpen More
74-Effects-3D Effects-Drop Shadow #000000 same parameters
75-Layers-Duplicate (Copy of Raster 2)
76-Image-Miroir
77-File-Open Deco 1
78-Edit-Copy
79-Deco 1 minimize return work
80-Edit -Paste As New Layer (Raster 3)
81-Image-Resize 70
82-Effects-Image Effects-Ofset
83-Adjust-Sharpness-Sharpen More
84-Effects-3D Effects-Drop Shadow #000000 same parameters
85-Layers-Duplicate(Copy of Raster 3)
86-Image-Miroir
87-File-Open Vase png
88-Edit-Copy
89-Vase png minimize return work
90-Edit -Paste As New Layer (Raster 4)
91-Image-Resize 55
92-Effects-Image Effects-Ofset
93-Adjust-Sharpness-Sharpen
94-Effects> Plugins > Alien Skin Eye Candy 5: Impact > Persctive Shadow
95-Settings-Short Perspective Shadow in Back
96-basic Settings
97-Layers-Duplicate (Copy of Raster 4)
98-Image-Miror
99-File-Open women tube
100-Edit-Copy
101-Minimize women tube
102-Return to work
103-Edit -Paste As New Layer (Raster 5)
104-Effects-Image Effects-Ofset
105-Adjust-Sharpness-Sharpen
106-Effects-3D Effects-Drop Shadow #000000 same parameters
Result
107-Image-Add Borders- Symetric 2 pixels-Background color #ffffff
108-Image-Add Borders- Symetric 2 pixels-Foreground color #660e37
109--Image-Add Borders- Symetric 30 pixels-Background color #ffffff
110- Click the Foreground color Gradient checked - Settings Linear
111- Activate Magıc Wand settings same parameters
 -White areas are selected as shown in the picture
113-Fill with Gradient
114-Effects-Texture Effect-Blinds
115-Effects-3D Effects-Drop Shadow #000000 same parameters
116-Selections -Select None
117-Image-Add Borders- Symetric 1 pixels-Foreground color #660e37
118-Add your name or watermark
119-Layers-Merge-Merge Visible
120-Image Resize 90 checked Resize all layers
121-Adjust-Sharpness-Sharpen
122 - Save jpg


